
How to Tie a Perfect Windsor Knot Step by Step Guide
If you’ve ever wondered how to tie a perfect Windsor knot, you’re in the right place. This classic knot, made famous by the Duke of Windsor himself, remains the gold standard for a bold, symmetrical, and elegant look in 2025. Whether you’re suiting up for an important business meeting, a wedding, or any formal event, mastering the full Windsor knot will instantly elevate your style. In this step-by-step guide, you’ll learn exactly how to create that flawless, balanced knot—complete with tips to fix common mistakes and get the all-important perfect dimple every time. Ready to stop fumbling and start knotting like a pro? Let’s get right to it.
Tools You Need for the Perfect Windsor Knot
Before you dive in, gather a standard necktie, preferably 57–58 inches long—this length suits most heights and gives you enough fabric to work with. For best results, choose ties made from medium-weight silk or wool blends; these fabrics hold the knot’s shape well without slipping.
Ideal Tie Length and Fabric
- Length: Aim for 57–58 inches to fit most body types comfortably.
- Fabric: Medium-weight silk or wool blends are ideal — too thin, and the knot looks floppy; too thick, and it’s hard to shape.
- Avoid shiny or overly textured fabrics, which can distort the knot’s clean lines.
Best Collar Types for the Windsor Knot
The Windsor knot is designed to pair with spread and cutaway collars. These collars’ wider openings perfectly frame the large, symmetrical shape of the Windsor, giving you that classic, polished look.
- Spread collars: Offer moderate to wide space between points.
- Cutaway collars: Feature a much wider gap, perfect for full Windsor’s size.
Mirror vs. No-Mirror Technique
When learning, you can either use a mirror to follow your hand movements directly—the “mirror technique”—or rely on memorizing the steps and tying without one.
- Mirror technique: Easier for beginners, it helps avoid confusion by showing the live view.
- No-mirror technique: More challenging but convenient once you get the hang of it.
Both ways work; pick whichever feels natural before moving on to the step-by-step instructions. Yes, it looks complicated the first time—it did for all of us!
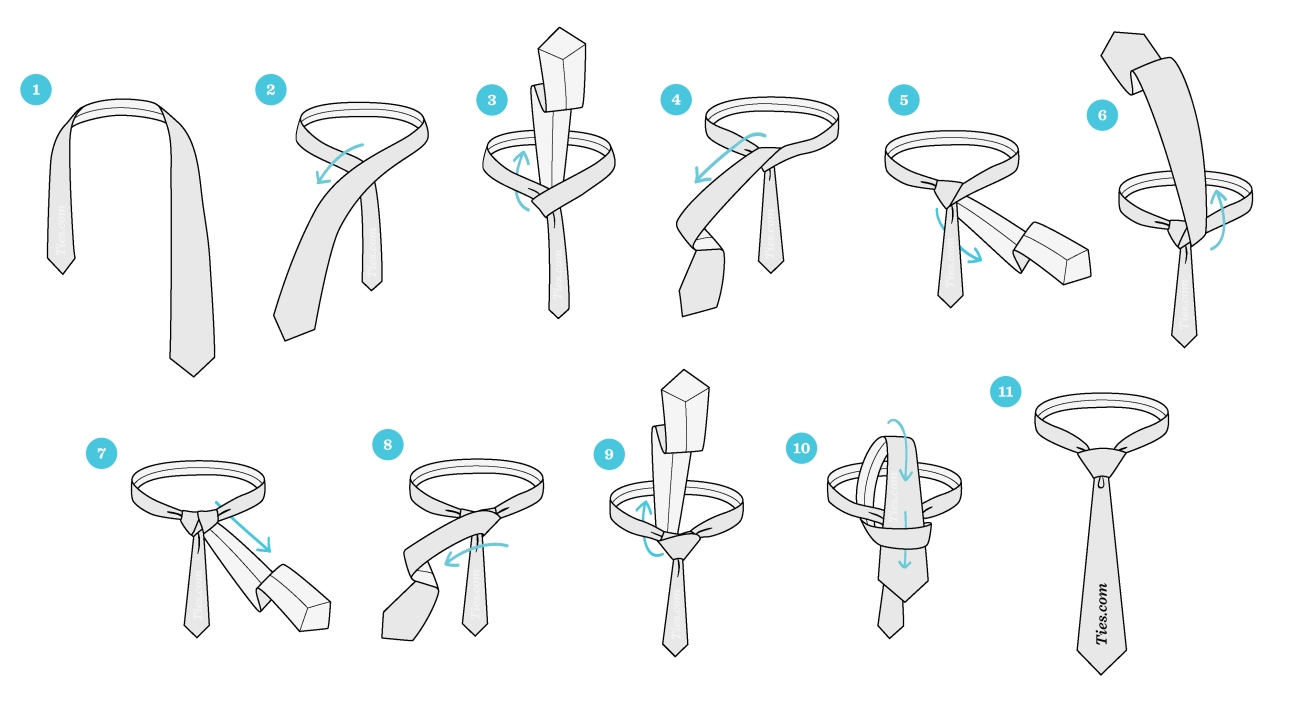
Step-by-Step Instructions (Mirror View)
Follow these simple steps using a mirror to tie the perfect Full Windsor knot:
- Start with the wide end on your right, hanging about 12–14 inches lower than the narrow end.
- Cross the wide end over the narrow end to the left.
- Bring the wide end up through the neck loop from underneath.
- Pull the wide end down and to the left.
- Pass it behind the narrow end to the right.
- Bring the wide end up and through the front of the neck loop again.
- Pull it down to the right, then across the front to the left.
- Take the wide end up into the neck loop from underneath one last time.
- Pass it down through the loop you just created in front.
- Gently tighten the knot by sliding it upward while shaping it neatly.
- Create and perfect the signature dimple by pinching the fabric just below the knot and pulling down.
Using a mirror helps keep track of each step and ensures your knot stays symmetrical and neat. For visual learners, combining this with clear instructions is key to mastering the Windsor knot.
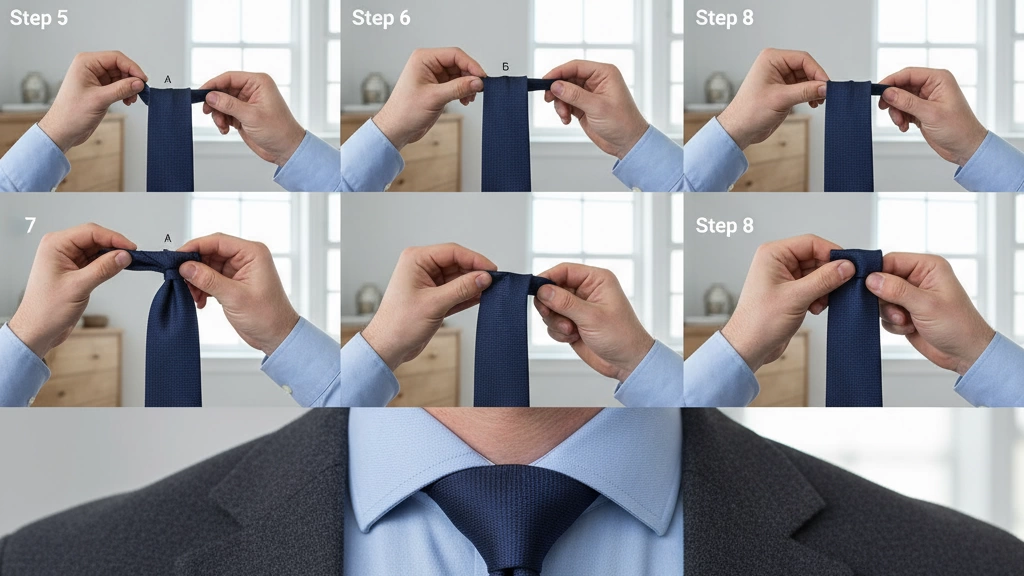
Visual Aids for Tying the Perfect Windsor Knot
To make learning the Windsor knot easier, we provide high-resolution numbered photos for every step of the process. These clear images help you follow along precisely, showing exactly how the tie should look at each stage.
Additionally, there’s an embedded short video (30–60 seconds) that demonstrates the entire tying process in real time. Watching the video gives you a smooth overview and helps you pick up subtle movements that photos alone might miss.
For those who want a quick refresher or need to see the steps in a loop, we also offer an animated GIF option. It’s perfect for a fast reference when you’re in a hurry but still want to nail that symmetrical Windsor knot.
These visual aids complement our step-by-step guide and are your best tools for mastering the full Windsor knot every time.
How to Get the Perfect Symmetrical Windsor Every Time
Getting a flawless Windsor knot starts with the right setup and finishing touches. Here’s how to nail it every time:
-
Exact starting length by height: Begin with the wide end about 12 to 14 inches below your narrow end, but adjust depending on your height and tie length. For taller people, start a bit lower to ensure enough fabric to complete the knot without ending with a too-short tie.
-
The “pinch and pull” dimple technique: Right after tying the knot, pinch the sides just below it and gently pull the tie’s narrow end down. This creates a crisp, professional dimple, which is a signature of a polished Windsor knot.
-
Keep the knot centered and horizontal: While tightening, hold the knot steady and slide it upward carefully. Make sure it sits squarely in the middle of your collar, with no lean to either side or twist.
-
Adjust for thick vs. thin ties: Thick ties need more space to wrap, so leave the wide end longer at the start. Thin ties require less length and tighter pulls to prevent a floppy knot. Tailor your starting length and tension accordingly.
Mastering these details ensures your Full Windsor knot looks symmetrical, balanced, and sharp every time you tie it. For fabric and style tips that pair well with the Windsor, check out our guide on skinny vs. classic ties.
Common Mistakes & How to Fix Them

Tying the perfect Windsor knot takes practice, but a few common mistakes can throw off your look. Here’s how to fix them:
-
Knot too big or too small
If your knot feels oversized, you probably started with the wide end too low. Adjust by shortening the starting length by a couple of inches. If it’s too small, let the wide end hang a bit lower before you start tying.
-
Crooked or leaning knot
A lopsided knot often means uneven tension while tightening. Make sure to pull the wide end straight and center the knot as you tighten. Using the mirror technique can help keep things symmetrical.
-
No dimple or multiple creases
A clean dimple is key to that polished look. Pinch just below the knot as you tighten and slide upward gently—avoid over-tightening, which creates unwanted creases instead of a smooth dimple.
-
Back blade showing
The narrow end (back blade) should be hidden behind the wide end after tying. If it shows, adjust your starting length or re-tie with more attention to wrap the wide end fully around the narrow side.
-
Tie too short or too long after tying
For the perfect length, the tip of the tie should just touch your belt buckle. If it’s too short, start with the wide end lower; too long means starting higher. An exact starting length formula based on your height can help you nail this every time.
Fixing these issues early saves you time and keeps your Windsor knot looking sharp all day. For extra help with your overall style and accessory care, check out our guide on how to clean your fashion jewelry and make it last longer.
Half Windsor vs. Full Windsor – Key Differences
The Half Windsor and Full Windsor knots both create polished looks but differ in size, symmetry, formality, and tying difficulty. Here’s a quick comparison to help you decide which knot suits your style and occasion:
| Feature | Half Windsor | Full Windsor |
|---|---|---|
| Size | Medium-sized knot | Large, wide knot |
| Symmetry | Nearly symmetrical | Perfectly symmetrical |
| Formality | Semi-formal and versatile | Very formal, traditional |
| Difficulty | Easier to tie | More steps, slightly harder |
| Best for collars | Standard, point, semi-spread | Spread and cutaway collars |
| Tie thickness | Works well with most fabrics | Better with thinner fabrics |
| Use occasions | Daily office, interviews | Weddings, formal meetings |
The Full Windsor gives that bold, commanding presence, perfect for big events or when you want your knot to stand out. The Half Windsor is more flexible and quicker for everyday wear.
For a detailed look at how these tie knots compare, check out this guide on formal tie knot tutorial that breaks down each style to help you pick the right one.
When to Wear (and When NOT to Wear) the Full Windsor
The Full Windsor knot is a classic choice for formal occasions where you want to make a polished impression. Think weddings, important business meetings, interviews, and black-tie events. Its wide, symmetrical shape pairs perfectly with spread and cutaway collars, lending an air of confidence and authority.
That said, the Full Windsor isn\’t ideal for casual or everyday wear. Its bulk can look out of place with slimmer lapels and lightweight fabrics. If your environment calls for a more relaxed or modern vibe, consider alternatives like the Four-in-Hand or the Pratt knot. These knots offer a sleeker profile and are easier to tie, making them popular professional tie knot options moving into 2025.
For versatile style advice and how to accessorize formal looks, check out this guide on what to wear for a winter wedding accessories edition. It’ll help you pair your Windsor knot with the right accents every time.
Pro Tips from Professional Stylists
Best Fabrics and Patterns for the Windsor Knot
For a sharp Full Windsor knot, opt for medium-weight fabrics like silk or wool blends. These materials hold the shape of the knot well without looking bulky. Avoid very thin or slippery fabrics, as they can make the knot loose or uneven. In terms of patterns, solid colors, subtle stripes, and classic textures complement the symmetrical Windsor best, giving a refined and balanced look that’s perfect for formal events or business settings.
Matching Tie Width to Lapel Width
A well-tied Windsor knot pairs best with a tie width that matches your jacket’s lapel. For example:
- Wide lapels (3.5 inches and above): Choose a wider tie (3.25-3.5 inches) for proportionate balance.
- Narrow lapels (under 3.25 inches): Use a slimmer tie but avoid going too skinny, or the knot can overpower the lapel.
The Windsor knot tends to be larger and symmetrical, so balancing those proportions is key to a polished final look.
How to Store Ties to Keep Them Ready for Perfect Knots
Storing your ties properly helps maintain their shape and ensures your Windsor knot always looks neat. Always hang ties on a tie rack or drape them over a hanger to avoid wrinkles and creases. Rolled storage is also a good option to keep the fabric from bending out of shape. For tips on tie care and storage, check out this detailed guide on storing your neckties that shares practical advice to keep your ties ready for every occasion.
Small details like fabric choice, matching widths, and proper storage all add up to making your Windsor knot look flawless every time.