

Best Hat Press for Leather Patches: Professional Equipment Review
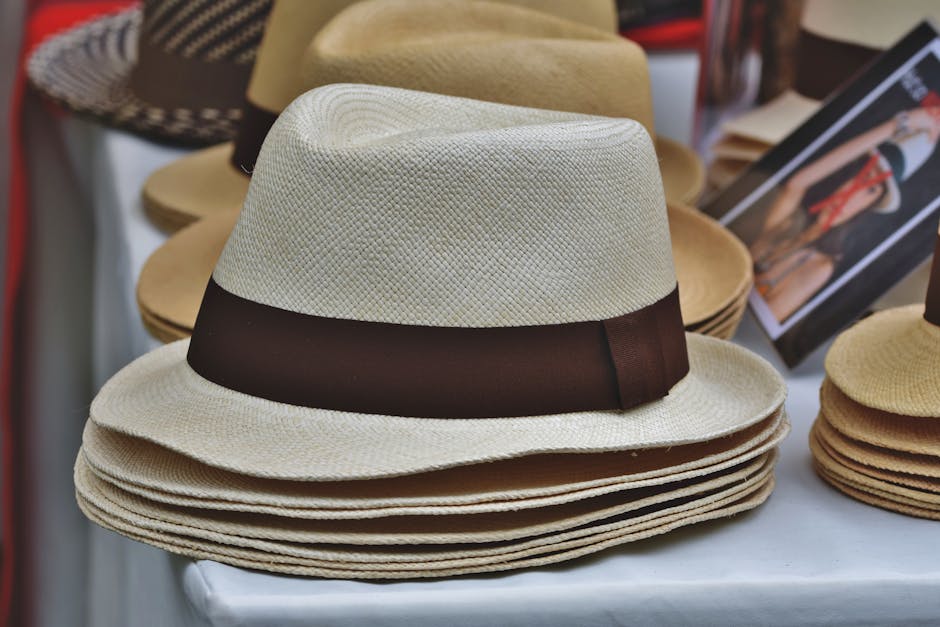
The rise of customized headwear in the contemporary fashion landscape has turned the humble trucker hat into a canvas for high-end branding, and nothing elevates a cap quite like a genuine leather patch. However, a common misconception in the custom apparel industry is that a standard flat heat press or a household iron is sufficient for securing leather patches to headwear. Many beginners assume that since leather is a durable material, it can withstand the brute force of high heat and uneven pressure. This logic frequently results in scorched brims, distorted leather grains, and patches that peel away after a single season of wear. Leather is an organic substrate; it reacts to thermal energy differently than cotton or polyester. Applying a patch to a curved surface like a 6-panel trucker hat requires a specific mechanical approach that manages both the curvature of the hat and the delicate temperature thresholds of the leather adhesive.
Choosing the right equipment involves more than just looking at a price tag. The interaction between the heating element and the hat’s buckram—the stiff fabric behind the front panels—is where most projects fail. If the press does not provide a uniform arc of pressure, the edges of the leather patch will not bond correctly. Furthermore, the thickness of the leather itself acts as a thermal barrier, requiring a machine that can maintain a steady temperature without fluctuating during the press cycle. This review examines the leading hardware options currently available, focusing on thermal consistency, platen design, and the specific requirements of leather-to-fabric bonding for professional-grade results.
Why specialized hat presses are necessary for leather patch adhesion
When you work with leather patches, you are essentially managing a sandwich of three distinct materials: the leather itself, the heat-activated adhesive (often a polyamide or polyurethane film), and the hat fabric. Unlike heat transfer vinyl (HTV), which is thin and flexible, leather has significant mass and acts as an insulator. This means the heat must penetrate through the leather to reach the glue, or conversely, come from underneath through the hat fabric. A flat press cannot achieve the necessary contact on a curved hat crown without creasing the fabric or leaving “ghosting” marks where the edge of the heater meets the brim. The structural integrity of the hat depends on this curved interface; flattening it, even temporarily, can break the internal buckram fibers, leaving the hat looking limp and worn before it ever reaches a customer.
Precision in temperature control is the secondary factor that separates professional equipment from hobbyist tools. Leather can begin to shrink, curl, or discolor at temperatures as low as 320°F (160°C). Most high-quality leather patch adhesives are designed to melt and achieve maximum “bite” between 270°F and 300°F. The margin for error is slim. A press with poor thermal recovery or “hot spots” will likely ruin the patch before the adhesive has a chance to flow into the fibers of the hat. Furthermore, the pressure must be firm enough to force the adhesive into the weave of the cap, but not so aggressive that it crushes the crown’s internal structure or leaves a permanent rectangular indentation around the patch site.
Professional-grade presses often feature specialized platens that accommodate different hat styles, from low-profile dad hats to high-crown foam truckers. These platens ensure that the specific area receiving the patch is held taut and flat against the heating element. Without this tension, the fabric can shift during the pressing cycle, leading to misaligned patches that are impossible to reposition once the glue has set. Additionally, the ability to interchange platens allows the user to work on different sizes, such as youth hats or oversized “big head” caps, without sacrificing the quality of the bond.
Top-rated hat press machines for leather patch application
Hotronix 360 IQ Hat Press
The Hotronix 360 IQ is widely regarded as the gold standard for leather patch application, primarily due to its unique dual-heat technology. Unlike traditional presses that only heat from the top, the 360 IQ features both a heated upper platen and a heated lower platen. This allows the user to apply heat from the bottom, which is the most effective way to activate leather patch adhesive without risking heat damage to the face of the leather. By heating the glue through the hat fabric rather than through the thick leather, you preserve the natural texture and color of the patch.
- Approximate Price: $1,650
- Technical Specs: 6″ x 3″ platen size; 120V/240V options; digital time, temperature, and pressure display; 360-degree print area.
- Pros: Independent control of top and bottom heat; eliminates scorching on heat-sensitive leathers; no “heat press lines” due to the molded lower platen; magnetic auto-open prevents over-application.
- Cons: Significant capital investment; heavy footprint (approx. 44 lbs) requires a dedicated, sturdy workspace; higher learning curve for the digital interface.
Geo Knight DK7
For those who require industrial durability without the complexity of dual-heat platens, the Geo Knight DK7 is a workhorse. It uses a “swing-away” design, which provides a clear workspace to align patches without the risk of burning your hands on the upper heater. The DK7 is known for its heavy-duty pressure adjustment, which is vital for thick, vegetable-tanned leather patches that require a deep bond. Its “SuperCoil-Microwinding” heater technology ensures that there are no cold spots across the heating face, which is a common cause of edge peeling in leather patches.
- Approximate Price: $675
- Technical Specs: 3.5″ x 7″ standard platen; 70°F–450°F temperature range; 20 lbs weight; manual toggle operation.
- Pros: Exceptional pressure range; extremely accurate digital temperature gauge; made with heavy-duty steel casting; lifetime warranty on the heater block.
- Cons: Manual operation can be fatiguing during high-volume production; top-down heat only requires careful use of protective sheets; lacks the bottom-heat benefits for thick leather.
Cricut Hat Press
The Cricut Hat Press is a handheld, consumer-focused device that has gained traction among small-scale creators and Etsy sellers. It utilizes a curved ceramic heat plate and a specialized pressing form (the “hat bush”) that sits inside the hat to provide resistance. While it lacks the mechanical leverage of a lever-action press, it offers a high degree of portability and a lower barrier to entry for hobbyists. The Bluetooth connectivity allows users to send precise settings directly from a smartphone, reducing the guesswork for beginners.
- Approximate Price: $130
- Technical Specs: 5″ x 3″ heat plate; three heat settings up to 400°F; weighs only 2.4 lbs; includes safety base.
- Pros: Affordable; small storage footprint; Bluetooth connectivity for automated settings via an app; great for “on-the-go” live event customization.
- Cons: Pressure is inconsistent as it depends on the user’s physical strength; not suitable for bulk orders; limited to smaller patch sizes; requires more manual dexterity to avoid shifting.
VEVOR Hat Heat Press (Pro Model)
Vevor offers a budget-friendly alternative for those entering the market who still want a stationary machine with professional features. Their professional model features a swing-away design similar to the Geo Knight but at a fraction of the cost. While the temperature fluctuations are slightly higher than premium brands, it remains a functional choice for synthetic leathers or thinner patches. It is an excellent “bridge” machine for those graduating from a handheld device to a stationary press.
- Approximate Price: $190
- Technical Specs: 3.75″ x 5.9″ platen; 0-999 second timer; aluminum heating plate; 110V power.
- Pros: High value for the price; includes a digital timer and temp controller; relatively lightweight and easy to move.
- Cons: Uneven heat distribution across the platen edges; lower build quality in the tension springs; shorter lifespan under heavy daily use; slower thermal recovery between presses.
Technical specifications and comparison for leather patch heat pressing
When evaluating these machines, the technical specifications reveal how they handle the specific physics of leather. The most critical metric is the temperature variance. In a high-end machine like the Hotronix, the temperature across the platen usually stays within 2-3 degrees of the set point. In budget machines, this can swing by as much as 15 degrees. For leather, which has a low scorching threshold, these swings can be catastrophic. The table below summarizes the key hardware differences that impact leather patch quality.
| Model Name | Heat Source | Temp Stability | Pressure Mechanism | Best For |
|---|---|---|---|---|
| Hotronix 360 IQ | Dual (Top & Bottom) | High (+/- 2°F) | Magnetic Auto-Open | High-volume Professional Shops |
| Geo Knight DK7 | Top Only | High (+/- 3°F) | Manual Toggle | Industrial/Heavy Use |
| Cricut Hat Press | Top Only (Handheld) | Moderate | Manual Pressure | Hobbyists & Small Batches |
| VEVOR Pro | Top Only | Low (+/- 12°F) | Manual Swing | Budget-conscious Startups |
Pressure distribution is another technical hurdle. Leather patches are significantly thicker than standard vinyl or screen-printed transfers. This thickness means that if the platen doesn’t meet the hat at a perfect perpendicular angle, the “leading edge” of the patch will receive more pressure than the “trailing edge.” This is why the 360 IQ’s 360-degree attachment is so effective; it pulls the hat down over the lower platen, creating a uniform surface tension that compensates for the thickness of the leather. If you are using a top-down press like the DK7 or Vevor, you must ensure your hat is perfectly centered on the lower platen and that the tensioning arm is adjusted to account for the extra 2-3mm of leather thickness.
Pro Tip: Regardless of the machine you choose, always use a Teflon sheet or a piece of parchment paper between the heating element and the leather. This prevents the direct heat from “glazing” the leather surface, which can give it an artificial, shiny appearance that ruins the rugged aesthetic of a natural patch.
Critical heat and pressure settings for various leather types

Successful application is as much about the operator’s settings as it is about the hardware. Real leather, especially vegetable-tanned varieties, contains moisture. When you hit it with 300°F of heat, that moisture turns to steam. If the steam cannot escape, it can cause the leather to bubble or the adhesive to fail. This is why many professionals prefer a “two-stage” press. First, a light 5-second pre-press to dry the fabric and the leather, followed by the full bonding press.
Standard Veg-Tan Leather Patches
Natural vegetable-tanned leather is the most common choice for premium headwear. It laser-engraves beautifully but is sensitive to heat. For these patches, the recommended setting is usually 280°F for 15 to 20 seconds with medium-heavy pressure. If you are using a dual-heat press, you can drop the top heat to 200°F and set the bottom heat to 300°F. This pulls the glue into the hat without baking the leather grain or causing the “ring” marks often seen with top-only heat.
Synthetic and Faux Leather (Leatherette)
Synthetic leathers are often made of plastic-based materials (PU or PVC) that melt at much lower temperatures than real leather. If you apply the same heat used for real leather, the patch may lose its texture, flatten out, or even fuse to your protective sheet. For leatherette, stay within the 260°F to 270°F range. The dwell time should be shorter—usually 10 to 12 seconds. Because these materials are thinner and more uniform, they require less pressure to achieve a flush bond with the hat fabric.
Chrome-Tanned and Dyed Leathers
Dyed leathers present a unique challenge: color migration. High heat can cause the dyes in the leather to liquefy and bleed into the hat fabric, especially on light-colored caps like white or heather gray. To mitigate this, use a lower temperature (around 275°F) and increase the dwell time to 25 seconds. This slower, cooler bake allows the adhesive to set without reaching the point where the leather dyes become volatile. Always perform a test press on a scrap piece of dyed leather before committing to a full production run.
Selecting the right hat styles for leather patches
The success of your patch application is also dependent on the “structure” of the hat you choose. Not all hats are created equal when it comes to heat resistance and surface area. For leather patches, the 6-panel trucker hat is the industry standard because it provides a stiff, reinforced front panel (the buckram) that acts as a solid substrate for the adhesive. However, you must be careful with the center seam. A thick leather patch pressed over a heavy center seam can sometimes create a “bridge” where the adhesive doesn’t touch the fabric on either side of the seam.
If you are working with 5-panel hats, which lack the center seam, you will find the application much easier and more consistent. For “dad hats” or unstructured caps, the lack of buckram means the fabric is floppy. In these cases, using a hat press with a strong tensioning system is mandatory to hold the fabric taut. If the fabric bunches under the patch during the press, the leather will eventually crease and the bond will fail. Always check the material composition of the hat; polyester blends are more prone to “scorching” or leaving a shiny heat mark than 100% cotton crowns.
Maintenance and longevity of your hat press

To ensure your equipment continues to provide the precision needed for leather work, regular maintenance is required. For stationary presses like the Geo Knight or Hotronix, the heating platen should be cleaned periodically with a specialized iron cleaner to remove any adhesive residue that may have off-gassed or leaked. If adhesive builds up on the platen, it creates an uneven surface that will result in inconsistent pressure on your next project.
Furthermore, check the silicone pad on the lower platen. Over time, the heat and pressure can cause the silicone to lose its “rebound” or develop indentations. If the bottom pad is not perfectly flat and resilient, the leather patch will not be pressed evenly into the hat fabric. For manual machines, lubricating the pivot points with a high-temperature lithium grease every six months will keep the pressure application smooth and prevent the “jerking” motion that can shift a patch just as the heating element makes contact. By maintaining your hardware, you ensure that the delicate balance of heat, time, and pressure remains consistent for every hat in your production line.
The final step in any leather patch application is the cooling phase. Adhesive is a thermoplastic; it is liquid when hot and solid when cold. If you handle the hat or pull it off the press while the patch is still hot, you risk shifting the patch or breaking the bond before it has fully crystallized. Let the hat sit on the platen or a cooling rack for at least 30 seconds. This patience ensures that the leather patch remains a permanent fixture of the garment, capable of enduring the rigors of daily wear and environmental exposure.